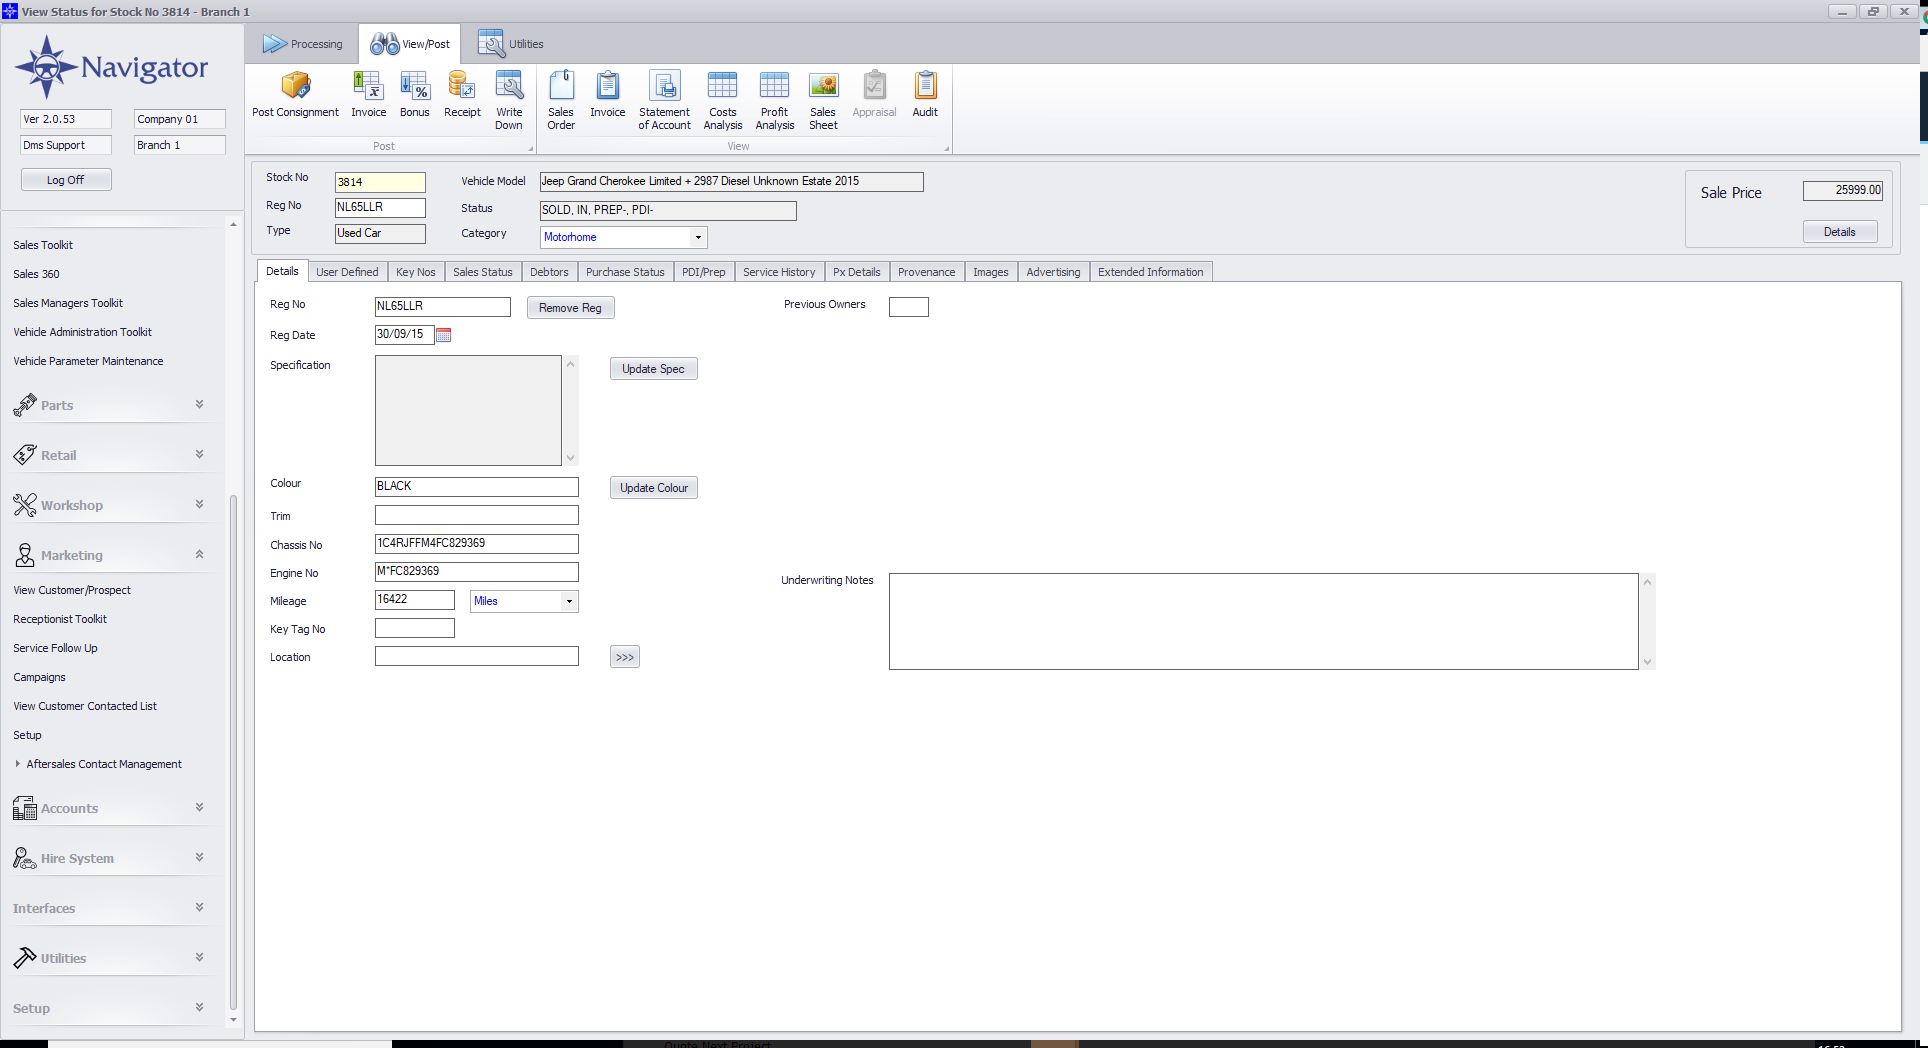
To post a Purchase Invoice against Stock Number go to the Navigator Main menu and select Vehicles. In the drop down menu that appears select Vehicle Administrators Toolkit.
The following window will appear:
Search for the required Stock Record. When the Stock Record appears on screen select the Purchase Status tab. A window similar to the below will appear:
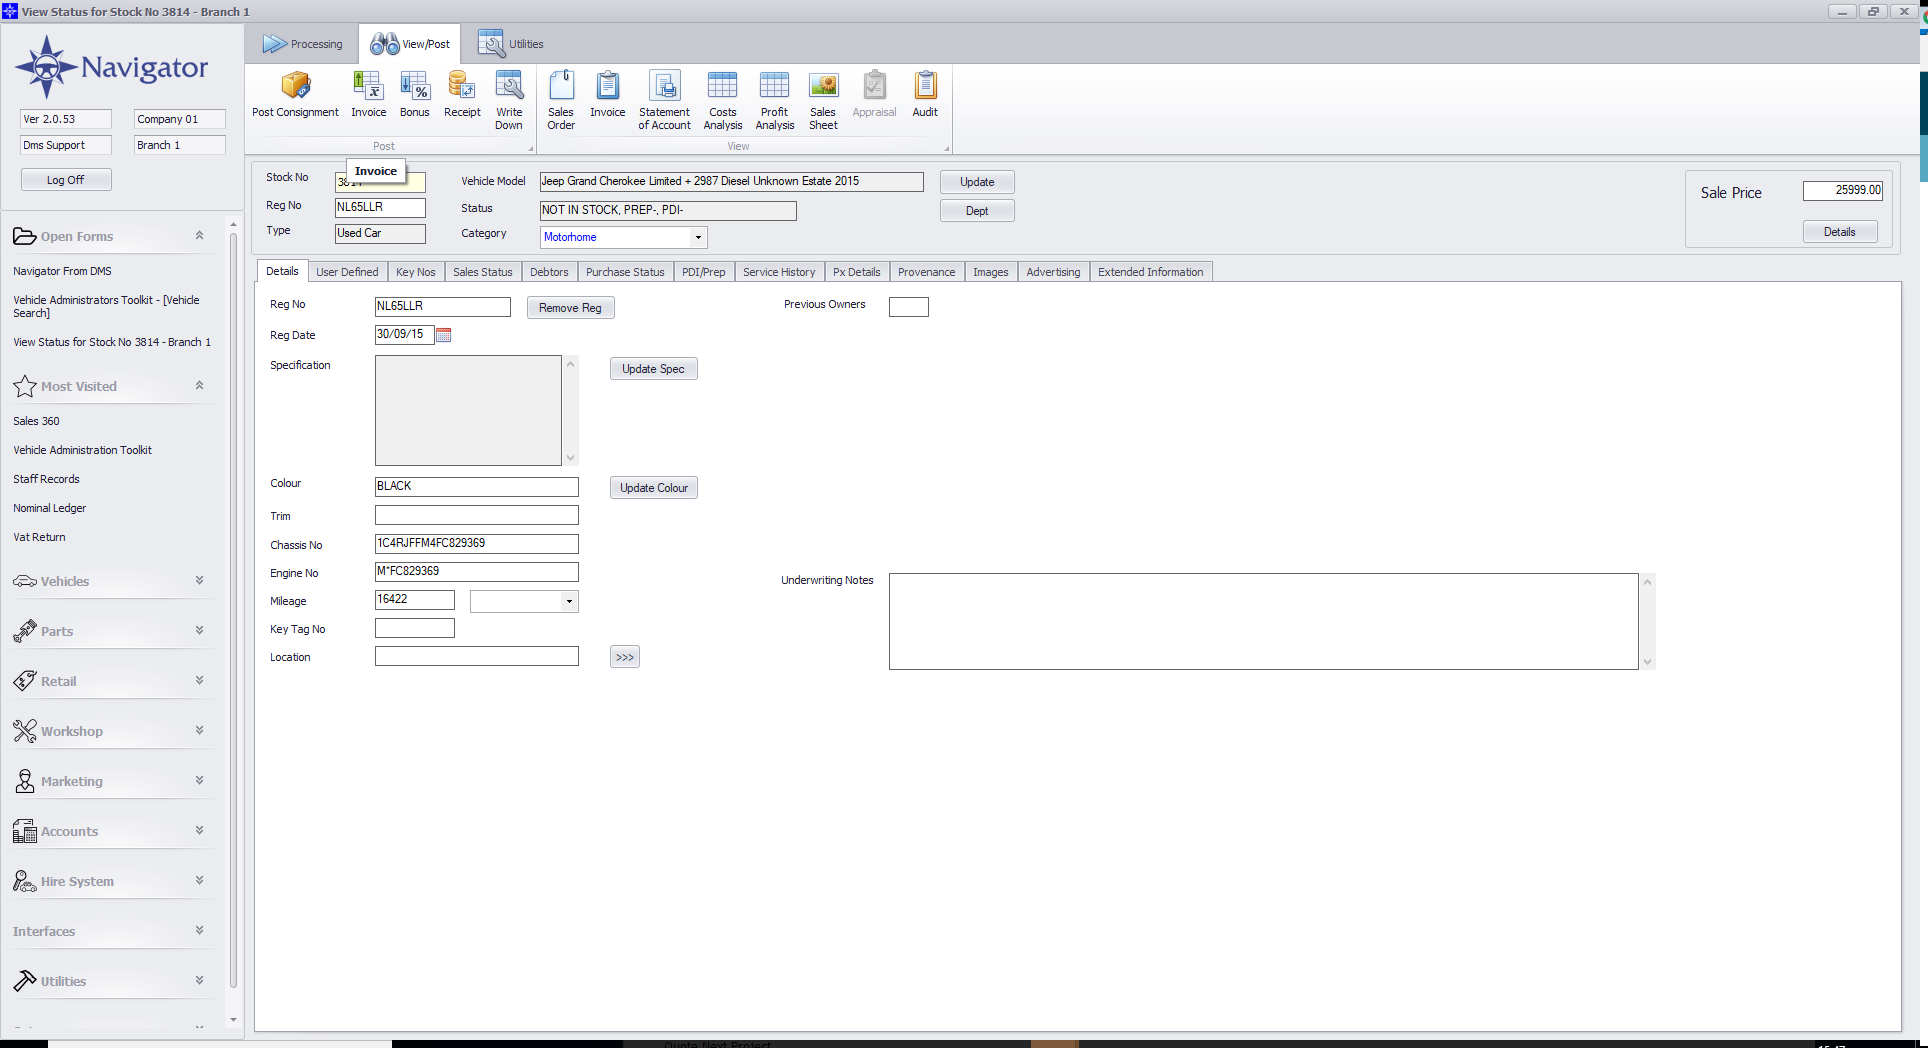
Select the Post Purchase button. The following window will then display.
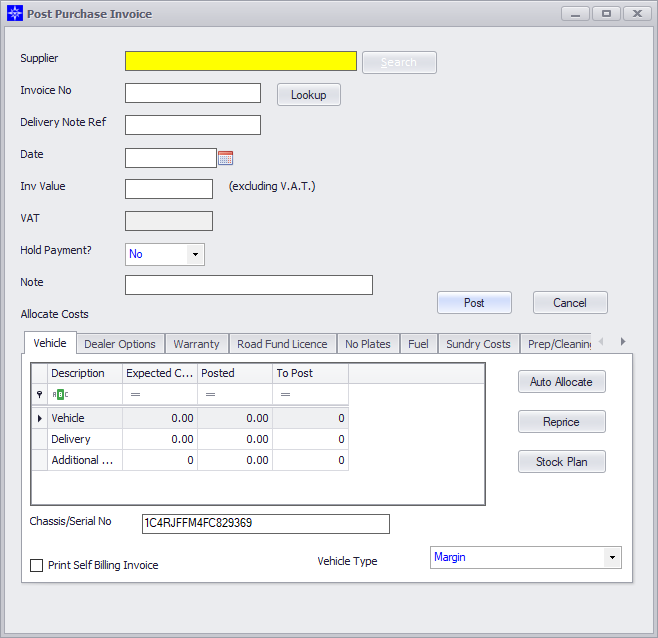
Fill in the following fields:
Supplier - Enter the supplier name or supplier account number
Invoice No - Enter the Invoice No (This will post an invoice directly to the Suppliers Purchase ledger account)
Please note, if you want to post an “Accrual” for the invoice, tab past the invoice number field and enter the relevant number in the “Delivery Note Ref” field.
This will post a cost against the vehicle and an entry into the GANI listing of the supplier.
Date - Enter the date of the Purchase Invoice
Invoice Value - inclusive of VAT if it is an Invoice, excluding VAT if it is a Delivery Note.
VAT - Enter vat amount - if applicable.
Hold Payment - Choose whether to hold payment of the invoice on the Purchase Ledger.This allows you to input an invoice even if it is in dispute, as it will be flagged as held in the Suppliers Purchase Ledger Account.
Note - Enter any note you feel is relevant to the posting; this note will appear alongside the entry in the Nominal Ledger.
The system defaults to the “Vehicle” tab, but you must choose the tab that is relevant to the cost you are posting.
If you are posting the vehicle cost, the system allows you to “Auto Allocate” which means that it will post the full value of the current invoice (less vat) against the vehicle.
If the invoice you are posting is only part of the vehicle cost, then select the “To Post” value box and enter the relevant cost.
Continue making postings until the full value of the invoice (less vat) has been allocated; the system will not let you out of this routine until you have.
Once fully allocated, select the Post button to file away the transaction.
The system will return you to the Purchase Status tab and you can view your posting via the Cost Analysis button.
If required, the system will produce a self-billing invoice by ticking the box at the bottom of the input window.